
Cauliflower Fried Rice Recipe: A Healthy Twist on a Classic Dish
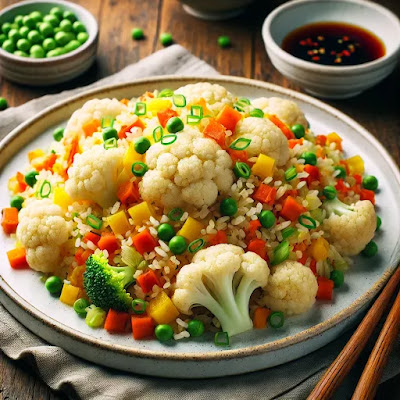
Cauliflower fried rice has become a popular dish for health-conscious individuals looking to enjoy the flavours of traditional fried rice without the added carbs. It’s a versatile and satisfying meal that caters to a variety of dietary needs, including low-carb, keto, and gluten-free lifestyles. Here’s how to make this tasty dish step-by-step, along with tips to customise it to your preferences. Ingredients You’ll Need: To make cauliflower fried rice, you’ll need the following ingredients: 1 medium head of cauliflower (or 4 cups of pre-riced cauliflower) 2 tablespoons of sesame oil (or your preferred cooking oil) 2 eggs , beaten 1 small onion , finely diced 2 cloves of garlic , minced 1 cup of mixed vegetables (e.g., peas, carrots, bell peppers, or corn) 3 tablespoons of soy sauce (use tamari or coconut aminos for a gluten-free option) 1 teaspoon of ginger , grated (optional) 2 green onions , thinly sliced Salt and pepper , to taste Optional protein: cooked chicken, shrimp, tofu, o...
%20topped%20with%20fresh%20green%20pesto,%20garnished%20with%20cherry%20tomatoes%20and%20parmesan%20cheese.%20The%20dish%20is%20served%20on%20a%20rusti.webp)


